
Growing up, I’ve always had a close relationship with my parents. I’m not closer to one parent over the other, but I do have a unique relationship with them both. I value my mother’s opinion on always looking like a lady, portraying correct manners, doing the right thing…along with many more valuable suggestions.

But my dad has always been there to teach me the ‘down and dirty’ skills such as indoor target shooting, camping, skeet shooting, and other activities that people would not believe that I actually do know how to do. Long story short, my relationship with my parents balances me out and has allowed me to become a fashionista who still knows how to properly shoot and aim a gun at a fake target.
That being said, it was not out of the ordinary on a recent trip to Nashville that my dad and I decided to share cooking skills in the kitchen. I had being hearing for months that he wanted to show me how to properly grill Halibut, so when I was home it was the perfect time for me to learn. While we were at it, I thought it was important for me to show him a thing or two in the kitchen as well, so I taught him how to make a yummy scallop appetizer plus how to make an ordinary dinner at home with my mom into something special.

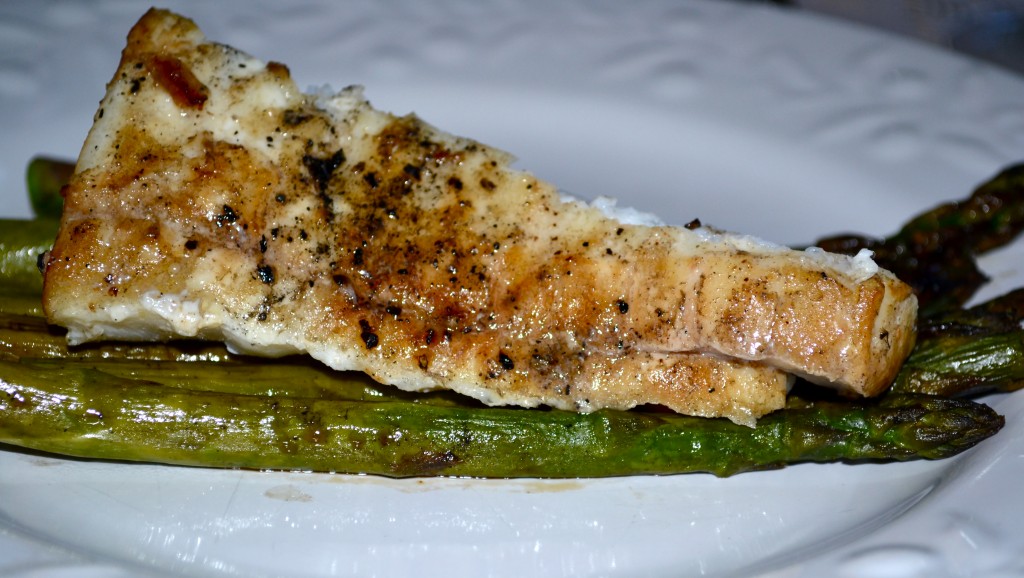
My father has this really cool grill called “The Green Egg,” and that literally is what it resembles. It allows him to place all of the essential utensils and prepared foods on the handy shelves provided on the Egg’s sides, and makes it easier to grill multiple foods at once. If you don’t have an Egg, this recipe also works perfectly on a one-time-use charcoal grill to use on your rooftop or local park that permits grilling.
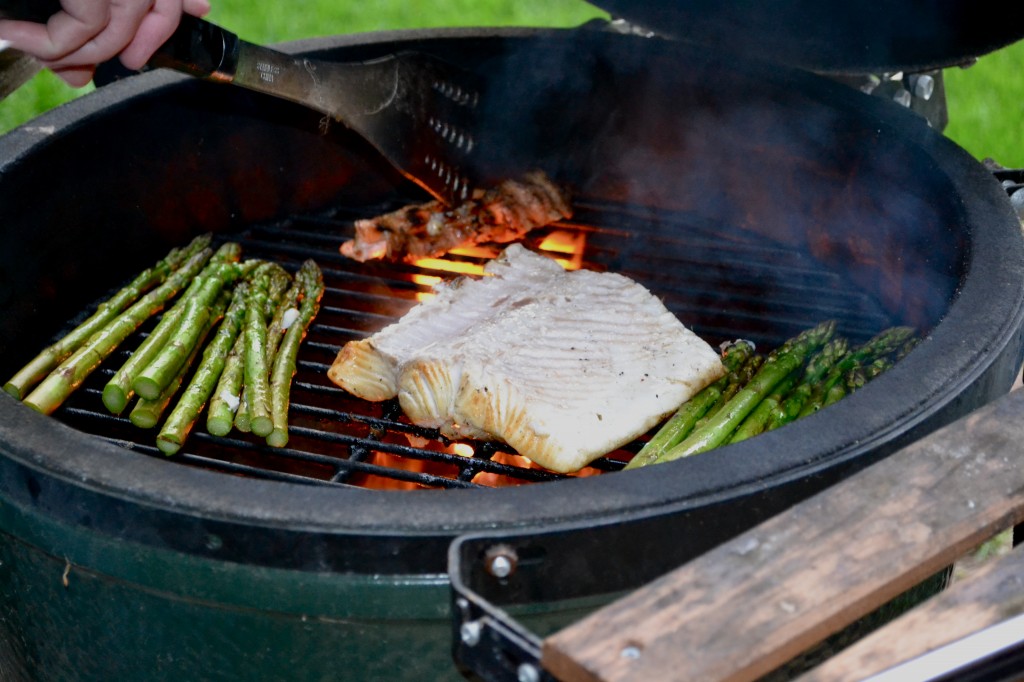
Note: To grill Halibut (we bought a one pound filet), put the grill on 350 or medium heat, brush on olive oil, salt, and pepper, and place the fish on the grates with the skin down. Wait five minutes, and then turn the fish over, which will allow the skin to easily peel off {keeping the skin on in the beginning enhances the fish’s flavor}. Wait for five more minutes, continuously checking, and it’s done! While cooking the Halibut, we decided to throw some asparagus on the grill (my favorite! Well, besides Brussel Sprouts…). It was incredibly easy to cook both at the same time, and the grill gives the asparagus the same grilled taste as the Halibut…perfect complement! After we finished the Halibut and asparagus, we placed them both onto a kitchen plate and covered it with aluminum foil to maintain heat while we started the appetizer.
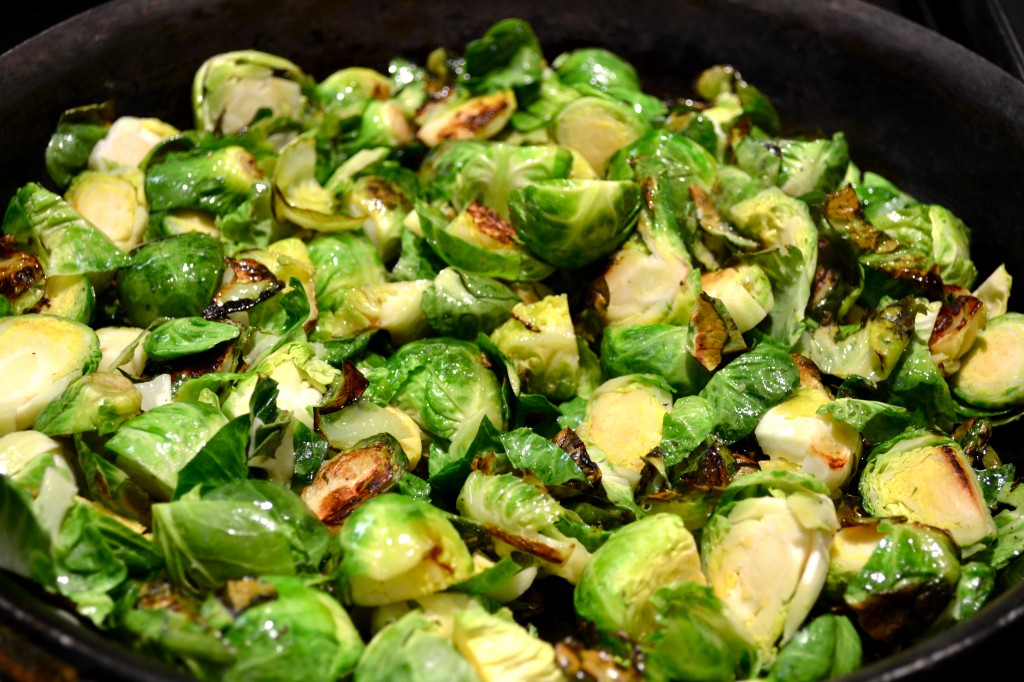
Placing two to three cups of Brussel Sprouts (previously chopped!) into a heated skillet with olive oil, I showed my dad how to properly stir and keep a good eye on them until they turned into a crisp brown color {note: when the Brussel Sprouts still have a tiny crunch, it is the perfect sidekick to the silky scallops we were about to make}.
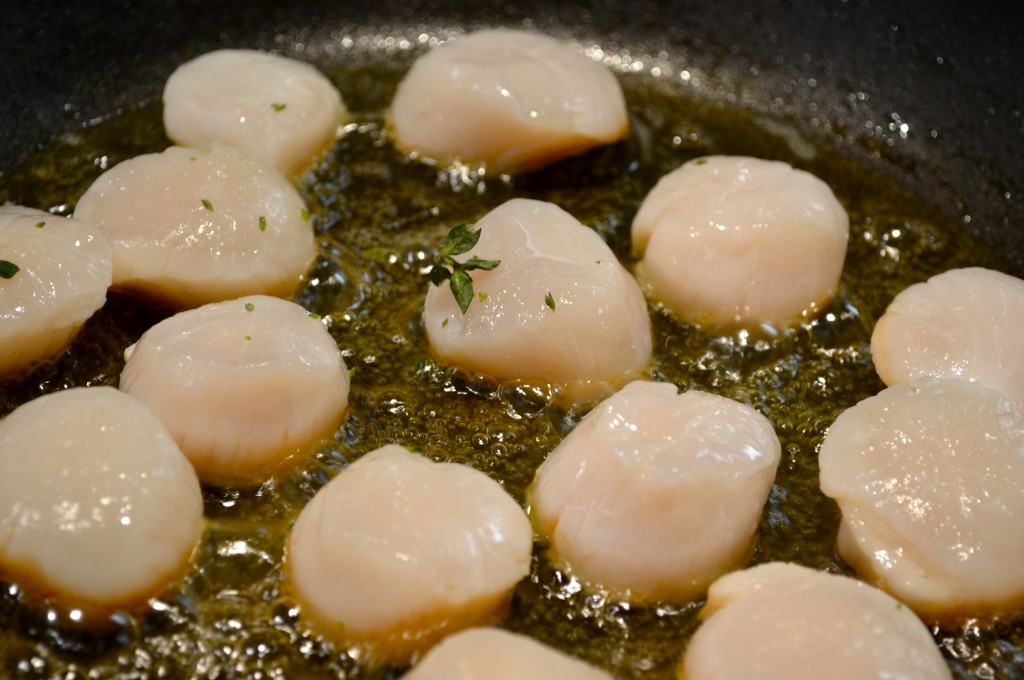
Before putting scallops into the skillet, pour a generous amount of olive oil and butter into the pan and place on medium heat. Once the oil begins to bubble, place the scallops in the hot oil. Throw on some oregano and a sprinkle a bit of lemon juice to enhance the flavor.
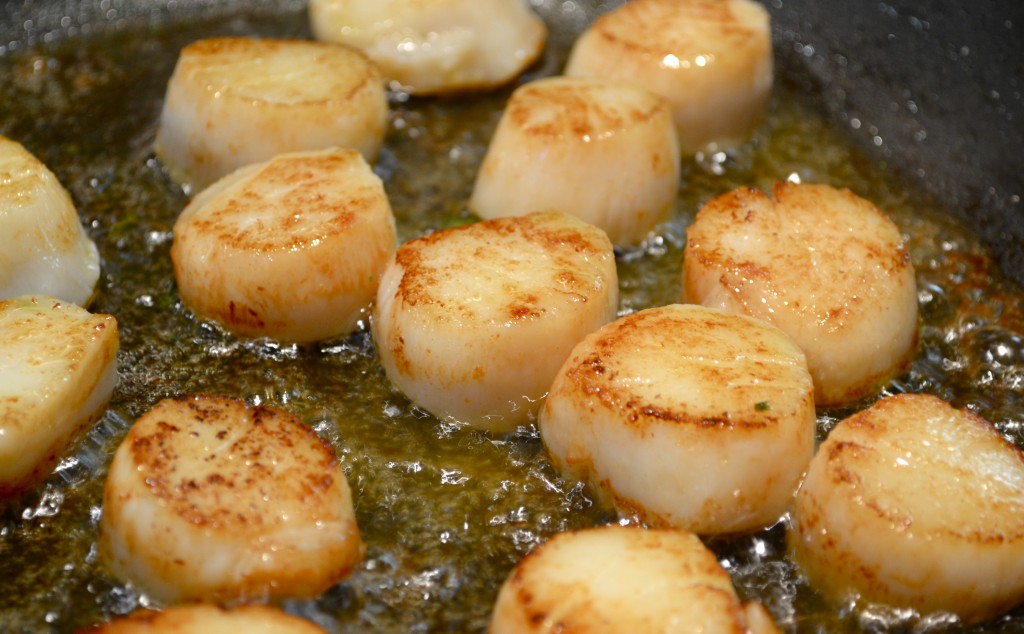
It doesn’t take long for the scallops to cook fully, so when you see the color begin to change along their sides, take a fork, stick it in the middle, and flip ‘em! Once both sides have a decent brown color, place them onto a dish.

You can place the scallops with the brussel sprouts however you desire, but to make it fun with my dad I decided to layer them in the middle of a bed of the veggies. Voila!
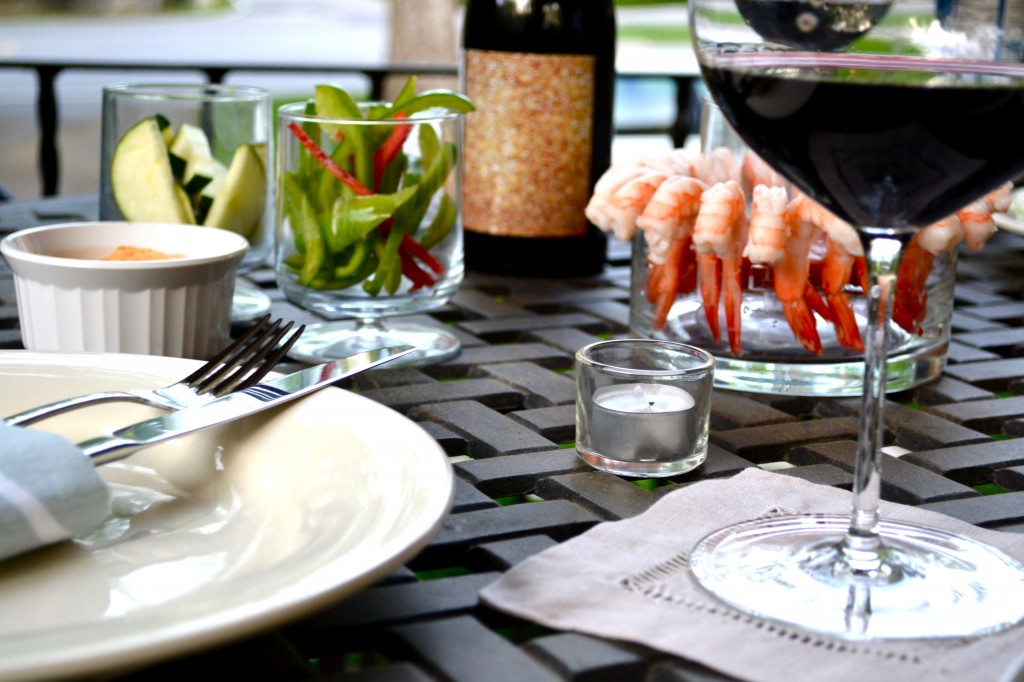
Now that our appetizer and main course were ready, I showed my dad how to simple it was to quickly set up little munchies on the table.
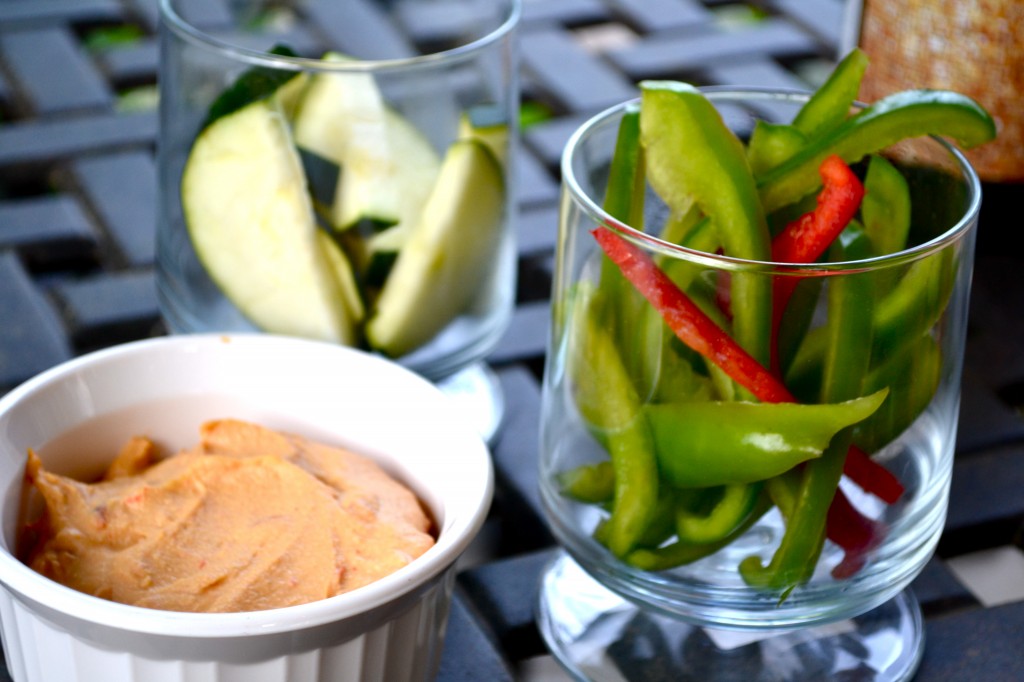
We gathered some colorful peppers and zucchini to dip into a roasted pepper hummus.

As well as some shrimp cocktail, and arranged them around a little bowl of cocktail sauce.
We had previously set the table on our porch, and were ready to go with a fabulous bottle of my favorite Spanish wine called Alto Moncayo. It added a little punch to the seafood dishes we were going to eat!
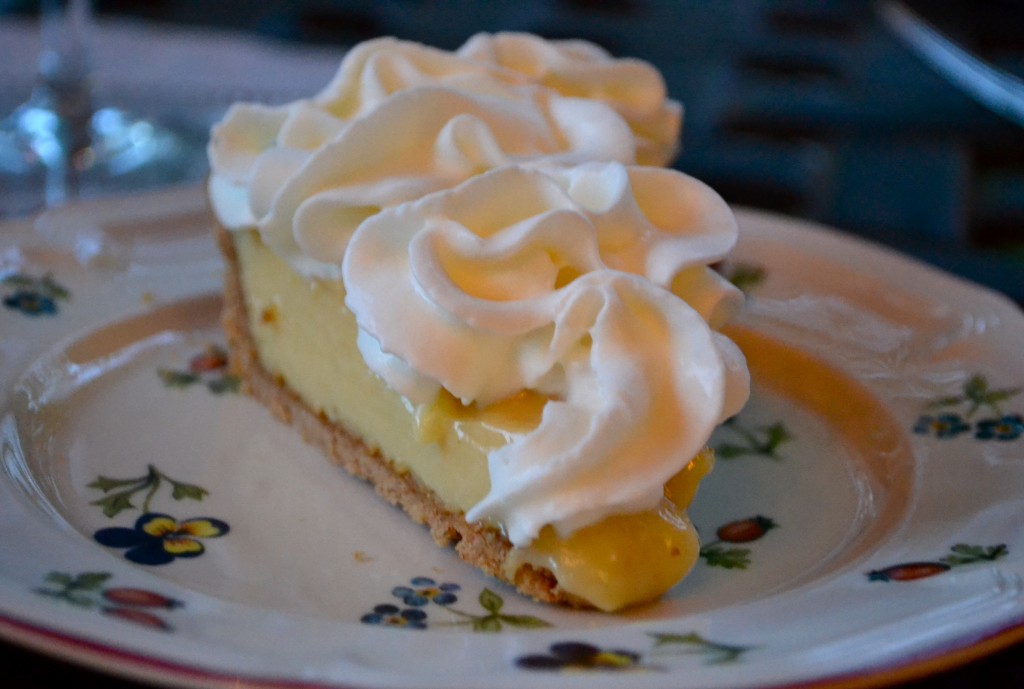
We decided to end the meal with a Key Lime Pie – it is incredibly easy to make! I always like to dash a bit of whipped cream on top of it to give it a feminine look. Try out the recipe below!
Key Lime Pie
1 (14-oz) can sweetened condensed milk
½ cup fresh key lime or lime juice*
1 teaspoon lime zest
4 egg yolks
1 Keebler Ready Crust Graham Pie Crust
Whipped Cream (I use the squirt canister style like Reddi-Wip or Whole Foods)
Preheat oven to 325 degrees.
In a medium bowl, beat egg yolks with a wire whisk until slightly thickened and lemon colored. Add sweetened condensed milk, lime peel and lime juice. Mix well. Pour lime mixture into the graham cracker crust.
Bake in the oven for 15 minutes and then allow to chill in the refrigerator for at least 2 hours.
To serve, top with whipped cream. If you want to get all fancy pants, you can garnish with a thin lime slice or sprinkle a little lime zest on top!
*Down South, if you substitute the lime juice for lemon juice, we call this Lemon Ice Box Pie and its equally as good!

I always have such a wonderful time in the kitchen with my dad, but half the fun is going to the Whole Foods store beforehand to pick out the essentials needed to make our dinner together a success.

These are the moments that I will never forget with my father, and I truly value every moment I get to visit my parents at home to not only spend time with both of them, but to learn something entirely new!


3 Comments